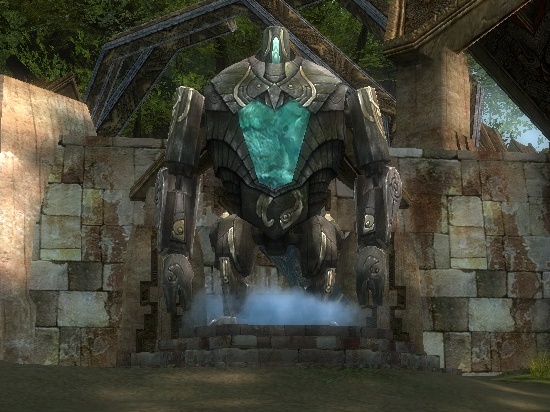
Northern Golem Kiln
Objectives
- Mamp in Rata Sum will brief you on the defenses. (disappears from Quest Log after speaking to Mamp)
- Protect each golem kiln as it heats up.
- Learn how to deploy golems into battle.
- Raze the Destroyer hive.
- Drop an Asuran beacon obtained from Sokka to summon golem reinforcements.
- Defeat the Bringers of Destruction protecting the hive.
Obtained from
- Mamp in Rata Sum
- Scrying Pool in Hall of Monuments (after first completion, select "I seek guidance" option)
Requirements
Rewards
Mode Experience
pointsAsura reputation points First time Repeats Normal 2,500 1,000 1001 Hard 1,500 150
- 1 Only if below rank 8.
Walkthrough
One technique is to start off by getting two Minion Masters, two Monks, and at least two damage-dealers. Separate into two parties, one east and one north. Stay on each side, when the opposite side has problems damage-dealers go to the problem and help. Once the G.O.L.E.M.s are finished heating up, the rest is easy.
If you only have heroes and henchmen then another method is to avoid starting the mission (don't approach the map marker) by instead heading north over the vine or east over the bridge around the area and killing off the stationed destroyers. You will still have to fight a few that spawn once you begin the mission, but it is much easier to protect both objectives. But if you are still having issues then, much like the alternate solution, flag your henchmen to one bridge and your heroes to another. If you still have the minions left from your destroyer killing spree from earlier then it's easier still. You can then hop from one bridge to the other giving support where neccessary.
Creatures
NPCs
Monsters
Bosses
Dialogues
Briefing from the Scrying Pool.
| Quest Log: | "These golems don't just make themselves, you know... although that's not a bad idea. But for now, this process takes some time. I'm sure our enemies don't want us to finish. Make yourself useful and defend this G.O.L.E.M. foundry from the attacking Destroyers." |
Cutscene 1
| Before the Battle | |
|---|---|
| <party leader>: | "Livia, I'm sorry about you and Gadd." |
| Livia: | "I learned a great deal from him that can help Kryta. Tell me, have you ever heard of the Scepter of Orr?" |
| Vekk: | "Just stop yelling and look at my calculations!" |
| Gadd: | "I don't need to look at your calculations. I know it will work." |
| Vekk: | "Well, the rest of us don't share your confidence." |
| <party leader>: | "What's the problem now?" |
| Gadd: | "This HACK is telling me I don't know how to format a crystal array!" |
| Vekk: | "I'm TRYING to say that you run a greater risk putting the crystals in a serial pattern than in parallel." |
| Gadd: | "You'll get twice the power this way." |
| Vekk: | "That's too much power, too fast! You'd flood the enchantment buffers!" |
| Gadd: | "Don't lecture me! I was formatting crystals before you were born." |
| <party leader>: | "Both of you, quiet! If you want to achieve anything, you have to stop squabbling." |
| Lork: | "Vekk! Gadd! The Destroyers!" |
| Gadd: | "Now what?" |
| Lork: | "The Destroyers! They're coming up from below! Hordes of them!" |
| Vekk: | "We're almost done with the golems, but we're not ready yet." |
| <party leader>: | "We can go hold them off." |
| Vekk: | "Should I come with you?" |
| Gadd: | "Go, go. You're just underfoot here." |
| Vekk: | "Remember: parallel, not serial!" |
| Gadd: | "Yes, yes. So noted." |
| Gadd: | "How do they expect me to get any work done with all these interruptions?" |
| Protect each golem kiln as it heats up: | |
|---|---|
| Gadd: | "Destroyer swarms are headed this way. Here is what we need to do: protect the golem kilns while they heat up. Once they get to the correct temperature, Vekk's human friend here can summon the magical brutes into battle." |
| Oola: | "Brutes? The Destroyers don't stand a chance against my magnificent golems!" |
| Gadd: | "Your golems? These things would be worthless junk without my power source." |
| Oola: | "Hrumph! Gadd's never lets anything like reality get in the way when it comes to claiming all the credit." |
| Sokka: | "Enough arguing. Here they come!" |
| Learn how to deploy golems into battle: | |
|---|---|
| Oola: | "It takes some time for the kilns to produce a golem squad, but once they are ready you'll be able to summon them to the front lines." |
| Gadd: | "It's quite ingenious; we've miniaturized the magic of an Asura Gate into handy, portable beacons. Young Sokka, here, will accompany you with a pack full of beacons." |
| Gadd: | "Obtain a beacon from him whenever a golem is ready to deploy. Drop it anywhere on the battlefield and a golem will gate into your position." |
| Oola: | "Fight your way to the hive and destroy it. The golems will overwhelm the hive, if our hypotheses are correct." |
| Gadd: | "Of course they will. I'm never wrong!" |
| Drop an Asuran beacon obtained from Sokka: | |
|---|---|
| Sokka: | "A golem is ready to be deployed!" |
| Sokka: | "Wow. This stuff is so cool! Toss me some work. I'm a team player."
|
| Defeat the Bringers of Destruction protecting the hive: | |
|---|---|
| Sokka: | "Oh, my! What is that thing?" |
Cutscene 2
Warning: The following text contains spoilers relating to the plot of Eye of the North.
| Price of Victory | |
|---|---|
| Ogden Stonehealer: | "That's a good day's fight!" |
| Vekk: | "It would have been harder without the golems." |
| <party leader>: | "Gadd and Oola got everything working just in the nick of time." |
| <party leader>: | "Oola, I was just telling Vekk about your golems." |
| Oola: | "Vekk, I have bad news. It's Gadd." |
| Vekk: | "What's he upset about now?" |
| Oola: | "He . . . He was trying to boost the power of the last golem." |
| Vekk: | "What are you saying?" |
| Oola: | "There was an explosion. He didn't make it. I'm sorry." |
| <party leader>: | "I don't understand. They hated each other. They argued all the time." |
| Oola: | "Fathers and sons argue sometimes. That doesn't mean they don't care." |
| <scene changes> | |
| Vekk: | "My father believed in the Eternal Alchemy. We are all part of a larger equation." |
| Vekk: | "And so we commend Gadd's remains to that greater equation." |
| Vekk: | "His ashes return to the universe, but his knowledge remains with us." |
| <party leader>: | "Vekk, we are all sorry." |
| Vekk: | "He died the way he lived: focused on his goal, and consequences be damned. I tried to warn him." |
| Livia: | "I know. I understand the need to protect the ones you love." |
| Livia: | "Always remember, he gave us a great victory." |
| Vekk: | "I don't know how many such victories I can stand." |
Notes
- You can only have two Golems active at a time.
- This mission is often confused with the sub-quest The Elusive Golemancer in the party search.
- On the north side, you have Gadd protecting a Golem-maker. He's a pain because he uses Iron Mist, which only allows lightning damage (you may find yourself doing 0 damage because of Gadd). To overcome this, move onto the bridge away from Gadd.
- Although dropping a beacon causes a G.O.L.E.M. 1.0 to arrive in a fairly spectacular manner, there is no reason to carry around a beacon or hold off on summoning one. They will follow you once summoned and in the unlikely event that one or both is destroyed, replacements will be summonable by a beacon promptly.
- If you use heroes and henchmen, it is wise to send your stronger team to the eastern side as it has a higher difficulty.
- The Golems follow whoever spawns them. Thus, it is useful to not have your puller spawn them. However, if a golem is following you you can order them to hold position by talking to them.
- When you reach the Destroyer hive, you will face two Level 28 Bringers of Destruction. Attacking them summons additional destroyer reinforcements, but the mission ends as soon as both Level 28's are killed - focus your fire on them. You can also lure them away from those additional reinforcements making this fight a lot easier (especially when you blind/weaken those two Level 28 Destroyers).
- Easily done with heroes/henchmen -- see discussion.
- This quest makes it easy to explore Riven Earth since you can avoid starting the quest and there are no enemies other than the Destroyers at the quest location.
- You can pull the Bringer of Destructions separately and avoid aggroing the destroyer spawn spots to make this mission much easier.