This build is designed to run from The Granite Citadel, through Tasca's Demise to the Ice Imp cave in Mineral Springs, and farm the imps for the Icy Dragon Sword. This build relies heavily on adrenaline and the Nightfall elite Rage of the Ntouka to supply some of it. The healing provided by Lion's Comfort is not affected by Rust cast by Siege Ice Golems and heals more than Healing Signet without decreasing your armor level.
Attributes and Skills[ | ]
| Attribute Rank | |
|---|---|
| Strength | 11 + 1 + 3 |
| Axe Mastery | 10 + 1 |
| Tactics | 9 + 1 |
| Inspiration Magic | 4 |
 |
 |
 |
 |
 |
 |
 |
 |
Equipment[ | ]
- Warrior Wyvern Armor (any armor that gives +10 AL vs Elemental attacks)
- Sentinel's Armor (Armor that gives +20 AL vs Elemental attacks when Strength is greater than or equal to 13 works well too)
- Running Set: Non-vampiric, non-zealous axe (preferably with an axe grip of Defense) and Stalwart Carapace Shield
- Fighting Set: Wing's Axe (Any zealous axe works. An axe grip of Defense or of Warding could also help.) and Stalwart Carapace Shield.
Usage[ | ]
Make sure that the Running Set is equipped. Run until the Ice Imp cave, so do not stop to fight anything but Siege Ice Golems and Ice Imps that may be encountered on the North path in Mineral Springs.
Getting to the Imp Cave[ | ]
If you have Defend Droknar's Forge in your quest log, you MUST abandon it, or Ice Imps will not spawn.
Due to the availability of heroes from Nightfall and the ability to flag heroes and henchmen, it may be better to attempt this build with a full group of eight for when there is a poor spawn. Run/Fight through Tasca's Demise to Mineral Springs, then fight your way to the Ice Imp cave. While soloing the imps, make sure that your henchmen/heroes names are grayed out, to increase the chances of picking up the drop. Or, the run could be restarted.
All of the running is done by using Rage of the Ntouka then Rush. Do not use Rush again until it starts rapidly flashing. Use Rage of the Ntouka to maintain adrenaline.
Make sure to watch the path of the Avicara, if you can. There are many times that the group will gather in one area and easily be run around.
Tasca's Demise

Start at The Granite Citadel and take the lower path through Tasca's Demise. If you're bringing along a hero/hench team, flag them near the back of the resurrection shrine.

Run through Tasca's Demise from the southern path. If you were quick enough, you will be able to beat a patrol of Stone Summit, usually with a variety of Dolyak Masters, Summit Beastmasters, and Stone Summit Rangers. If not, run past the bridge and wait until the patrol comes around. Be careful not to aggro anything. When they've passed you by, sneak around the edge an across the bridge.

Carefully move forward, until you see another patrol with a Siege Ice Golem and smaller Stone Summit. Back up along the wall to your right, until you are behind the branch in the path. Wait for them to pass and run forward.
There's another patrol that will be on your right. Avoid these, if possible. If the spawn to your left is in front of you near the center and not all to the left, you'll need to attempt to run through. You will have Crippling Anguish casted on you. If you did not bring henchman/heroes, try to get as close to Mineral Springs portal as possible. If you did, unset the flag to cause them to follow you. If all of them die, get as close to the portal as possible. If some are alive, send them ahead and into the mob before you attempt a run to the portal. In any case, if you don't survive, you should be resurrected near the portal, so just run there.
Mineral Springs
There are two paths to the Ice Imp cave. Note that if you encounter Hyl Thunderwing and have Iron Mist cast on you, immediately stop and use Dolyak Signet, Rage of the Ntouka, and Lion's Comfort. Once Iron Mist and Dolyak Signet have worn off, immediately start running.

N1: Ice Imps and Siege Ice Golems
N2a: first bridge, should be able to run through easily
N2b: second bridge, if you see several Avicara Braves, aggro then run backwards before running past
S1: Avicara Fierce patrol, run past, they move slowly
S2: Pinesouls, try to run opposite of where most of them are to avoid Barbed Trap
S3: Tundra Giants, aggro and use Dolyak Signet and "Watch Yourself!" when available
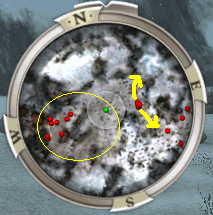
The north path is considerably shorter, but it's also more dangerous if the Avicara spawn too close to a group (or two!) of Ice Imps and a Siege Ice Golem. You will need to stop and fight these, as their water hexes will constantly be slowing you down. The way to fight them is covered below in Ice Imp Cave. If you're fighting your way to the Ice Imp cave with heroes/henchmen, this is the best path.

If you find yourself body blocked on a bridge, just run back from the bridge and run around the mob.
The south path is longer but usually easier to run through. Also, you will pass by another resurrection portal, so if your attempts at running to the Ice Imp cave/soloing imps is unsuccessful, you will be closer to the cave and can lower your DP by killing the nearby Tundra Giants. Soon after the entrance and some trees, you'll encounter a large patrol of Avicara Fierce that have a long patrol path, so don't wait for them, just run path them early on. You will then encounter an area with a few Pinesouls that will cripple you with Barbed Trap and further slow you down with Muddy Terrain. The Juniper Bark that pop up can be ignored (only Level 7 Monks!) if you need to heal, after losing the aggro of the Pinesouls.
When you see that you're near the second resurrection shrine, stay closer to your left, other than when you see an Avicara boss and group. It is crucial that you lose their aggro before encountering the Tundra Giants. You will need to solo these, but that can easily be done by keeping Dolyak Signet on you. Using "Watch Yourself!" also helps, but do NOT use Elemental Resistance, since it reduces your physical resistance. Try to kill only the ones in the group blocking your path to the narrow passageway. The others can be left for DP reduction later on.
Run up the narrow path, being careful not to be body blocked. When you're past the narrow passageway, be careful with your aggro. You must lose aggro before encountering the Ice Imps. If you see that there are Avicara with the group of Ice Imps and you're running solo, you will need to restart from The Granite Citadel. It's possible that you'll see Mountain Trolls and Siege Ice Golems, but these should not be no problem. If you brought along henchmen/heroes, run in to kill the Avicara before flagging the henchmen/heroes away.
Ice Imp Cave[ | ]
Before encountering the imps, you can boost your adrenaline by using Rage of the Ntouka. By using it at least once, you can encounter the imps with Dolyak Signet, Elemental Resistance, and "Watch Yourself!". Once your energy is full, switch to the weapon set for fighting.
Always keep Dolyak Signet and Elemental Resistance up. Use "Watch Yourself!" when possible. Make sure that if you want to heal, use Lion's Comfort BEFORE the recharge on Dolyak Signet reaches the lower right hand corner of the skill icon, or it will be left recharging for 12 seconds. Don't use Rage of the Ntouka too often, or you may not have enough energy left to use Elemental Resistance. If there are trolls in the cave, make sure to kill those first, since they can interrupt you with Disrupting Chop. Siege Ice Golems can be killed after them, so that you aren't knocked down if Dolyak Signet isn't reused in time. Try to aggro smaller groups at a time, since you will usually be taking damage, though smaller amounts. You can also backup so that some of the ice imps aren't casting spells at you.
If your region has favor, kneel at the statue of Lyssa, and pay 50 gold for Holy Blessing (To Conquest).
When you've cleared the cave, make your way up the ramp. Once that is cleared, slowly move forward towards Ice Beast, if you see more imps outside of the cave. The Ice Beast can be ignored and cannot be killed solo with this build. Azure Shadow will popup. Run back immediately after you aggro one. You can only take on one or two alone, so do not rush ahead. If you do aggro too many, just resign or map travel somewhere else. If you have henchmen/heroes, cancel the flag and aggro the Azure Shadow before running back down the ramp. Wait for the henchmen/heroes and kill the Ice Beast and Azure Shadows. Flag them away again and repeat the process, until the imps are dead. Infuse your armor with the Seer if you need to, and/or finish the run. A quick way to restart the run, if you took the northern path is to die on purpose, zone to Tasca's Demise, and rezone. Wintergreen Candy Canes are good for removing DP encountered by this.
Counters[ | ]
Interrupts, stance removal, and/or adrenaline denial would pretty much render this build useless.
Variants[ | ]
Sword Use: Redistribute points in Axe Mastery to Swordsmanship. Replace Executioner's Strike with Standing Slash or replace Desperation Blow and Executioner's Strike with Sever Artery and Gash.
Notes[ | ]
Wintergreen Candy Canes are nice to quickly cover any mistakes that cause DP, particularly if it's your first attempt at this. It's also good to clear the path with henchmen/heroes before attempting a run to familiarize yourself with it.
Templates[ | ]

|
{{#widget:DownloadTemplate|data=ARRxgirUr5AY/Jcl/aaBJMUgKA|name=Olah/Build:W/Me Raging IDS Farmer}} |
See also[ | ]
[[Build:W/Mo Regeneration IDS Farmer]]