GW-MRA@legacy41688883 (talk | contribs) mNo edit summary |
Mendel17257@legacy41699584 (talk | contribs) (→Eye of the North Elite Headgear: it appears there is confusion about head_front vs. front_head) |
||
| (33 intermediate revisions by 17 users not shown) | |||
| Line 1: | Line 1: | ||
| + | {{cleanup}} |
||
==Description== |
==Description== |
||
This chart shows the different types of attribute and other headgear available to [[Warrior]]s. |
This chart shows the different types of attribute and other headgear available to [[Warrior]]s. |
||
| Line 60: | Line 61: | ||
|align=center| 35 |
|align=center| 35 |
||
|align=right| {{Cost|50}} |
|align=right| {{Cost|50}} |
||
| − | | 1 [[Iron]] |
+ | | 1 [[Iron Ingot|Iron]] |
| |
| |
||
| |
| |
||
| Line 72: | Line 73: | ||
| rowspan="3" align=center| 50 |
| rowspan="3" align=center| 50 |
||
| rowspan="3" align=right| {{Cost|150}} |
| rowspan="3" align=right| {{Cost|150}} |
||
| − | | rowspan="3"| 2 [[Iron]] |
+ | | rowspan="3"| 2 [[Iron Ingot|Iron]] |
| − | | rowspan="3" colspan="5" align=center| 4 [[Iron]]<br>1 [[Steel]] |
+ | | rowspan="3" colspan="5" align=center| 4 [[Iron Ingot|Iron]]<br>1 [[Steel Ingot|Steel]] |
| − | | rowspan="3"| 4 [[Iron]]<br>4 [[Hide]] |
+ | | rowspan="3"| 4 [[Iron Ingot|Iron]]<br>4 [[Tanned Hide Square|Hide]] |
|- |
|- |
||
! [[Yak's Bend]] |
! [[Yak's Bend]] |
||
| Line 86: | Line 87: | ||
| rowspan="3" align=center| 59 |
| rowspan="3" align=center| 59 |
||
| rowspan="3" align=right| {{Cost|250}} |
| rowspan="3" align=right| {{Cost|250}} |
||
| − | | rowspan="3"| 3 [[Iron]] |
+ | | rowspan="3"| 3 [[Iron Ingot|Iron]] |
| − | | rowspan="3" colspan="5" align=center| 6 [[Iron]]<br>1 [[Steel]] |
+ | | rowspan="3" colspan="5" align=center| 6 [[Iron Ingot|Iron]]<br>1 [[Steel Ingot|Steel]] |
| − | | rowspan="3"| 6 [[Iron]]<br>6 [[Hide]] |
+ | | rowspan="3"| 6 [[Iron Ingot|Iron]]<br>6 [[Tanned Hide Square|Hide]] |
|- bgcolor=lightgrey |
|- bgcolor=lightgrey |
||
! [[Beetletun]] |
! [[Beetletun]] |
||
| Line 101: | Line 102: | ||
| rowspan="2" align=right| {{Cost|400}} |
| rowspan="2" align=right| {{Cost|400}} |
||
| rowspan="2"| |
| rowspan="2"| |
||
| − | | rowspan="2" colspan="5" align=center| 8 [[Iron]]<br>2 [[Steel]] |
+ | | rowspan="2" colspan="5" align=center| 8 [[Iron Ingot|Iron]]<br>2 [[Steel Ingot|Steel]] |
| − | | rowspan="2"|8 [[Iron]]<br>8 [[Hide]] |
+ | | rowspan="2"|8 [[Iron Ingot|Iron]]<br>8 [[Tanned Hide Square|Hide]] |
|- |
|- |
||
! [[Henge of Denravi]] |
! [[Henge of Denravi]] |
||
| Line 112: | Line 113: | ||
|align=right| {{Cost|700}} |
|align=right| {{Cost|700}} |
||
| |
| |
||
| − | | colspan="5" align=center|9 [[Iron]]<br>3 [[Steel]] |
+ | | colspan="5" align=center|9 [[Iron Ingot|Iron]]<br>3 [[Steel Ingot|Steel]] |
| − | | 9 [[Iron]]<br>9 [[Hide]] |
+ | | 9 [[Iron Ingot|Iron]]<br>9 [[Tanned Hide Square|Hide]] |
|- bgcolor=lightgreen |
|- bgcolor=lightgreen |
||
! [[Droknar's Forge]] |
! [[Droknar's Forge]] |
||
|align=center| [[Seifred]]<br>[[Morgren]] |
|align=center| [[Seifred]]<br>[[Morgren]] |
||
|align=center| 80 |
|align=center| 80 |
||
| − | |align=right| {{Cost|1| |
+ | |align=right| {{Cost|1|000}} |
| |
| |
||
| − | | colspan="5" align=center|25 [[Iron]]<br>4 [[Steel]] |
+ | | colspan="5" align=center|25 [[Iron Ingot|Iron]]<br>4 [[Steel Ingot|Steel]] |
| − | | 25 [[Iron]]<br>16 [[Hide]] |
+ | | 25 [[Iron Ingot|Iron]]<br>16 [[Tanned Hide Square|Hide]] |
|- |
|- |
||
|} |
|} |
||
| − | |||
| − | |||
==== Armor related helms (+ Lieutenant's)==== |
==== Armor related helms (+ Lieutenant's)==== |
||
| Line 141: | Line 140: | ||
| |
| |
||
| |
| |
||
| − | | 2 [[Iron]] |
+ | | 2 [[Iron Ingot|Iron]] |
| |
| |
||
| |
| |
||
| Line 153: | Line 152: | ||
| rowspan="3"| |
| rowspan="3"| |
||
| rowspan="3"| |
| rowspan="3"| |
||
| − | | rowspan="3"| 4 [[Iron]]<br>1 [[Fur]] |
+ | | rowspan="3"| 4 [[Iron Ingot|Iron]]<br>1 [[Fur Square|Fur]] |
| rowspan="3"| |
| rowspan="3"| |
||
| − | | rowspan="3"| 4 [[Iron]]<br>1 [[Scale]] |
+ | | rowspan="3"| 4 [[Iron Ingot|Iron]]<br>1 [[Scale]] |
| rowspan="3"| |
| rowspan="3"| |
||
| rowspan="3"| |
| rowspan="3"| |
||
| Line 171: | Line 170: | ||
| rowspan="3"| |
| rowspan="3"| |
||
| rowspan="3"| |
| rowspan="3"| |
||
| − | | rowspan="3"| 6 [[Iron]]<br>1 [[Fur]] |
+ | | rowspan="3"| 6 [[Iron Ingot|Iron]]<br>1 [[Fur Square|Fur]] |
| rowspan="3"| |
| rowspan="3"| |
||
| − | | rowspan="3"| 6 [[Iron]]<br>1 [[Scale]] |
+ | | rowspan="3"| 6 [[Iron Ingot|Iron]]<br>1 [[Scale]] |
| rowspan="3"| |
| rowspan="3"| |
||
| rowspan="3"| |
| rowspan="3"| |
||
| Line 193: | Line 192: | ||
| |
| |
||
| |
| |
||
| − | | 8 [[Iron]]<br>2 [[Silk]] |
+ | | 8 [[Iron Ingot|Iron]]<br>2 [[Bolt of Silk|Silk]] |
|- |
|- |
||
! [[Ventari's Refuge]] |
! [[Ventari's Refuge]] |
||
| Line 199: | Line 198: | ||
| rowspan="2" align=center| 65-70 |
| rowspan="2" align=center| 65-70 |
||
| rowspan="2" align=right| {{Cost|400}} |
| rowspan="2" align=right| {{Cost|400}} |
||
| − | | rowspan="2"| 4 [[Iron]] |
+ | | rowspan="2"| 4 [[Iron Ingot|Iron]] |
| rowspan="2"| |
| rowspan="2"| |
||
| − | | rowspan="2"| 8 [[Iron]]<br>2 [[Fur]] |
+ | | rowspan="2"| 8 [[Iron Ingot|Iron]]<br>2 [[Fur Square|Fur]] |
| rowspan="2"| |
| rowspan="2"| |
||
| − | | rowspan="2"| 8 [[Iron]]<br>2 [[Scale]] |
+ | | rowspan="2"| 8 [[Iron Ingot|Iron]]<br>2 [[Scale]] |
| rowspan="2"| |
| rowspan="2"| |
||
| rowspan="2"| |
| rowspan="2"| |
||
| Line 214: | Line 213: | ||
|align=center| 71-76 |
|align=center| 71-76 |
||
|align=right| {{Cost|700}} |
|align=right| {{Cost|700}} |
||
| − | | 8 [[Iron]] |
+ | | 8 [[Iron Ingot|Iron]] |
| − | | 9 [[Iron]]<br>3 [[Steel]] |
+ | | 9 [[Iron Ingot|Iron]]<br>3 [[Steel Ingot|Steel]] |
| − | | 9 [[Iron]]<br>3 [[Fur]] |
+ | | 9 [[Iron Ingot|Iron]]<br>3 [[Fur Square|Fur]] |
| |
| |
||
| − | | 9 [[Iron]]<br>3 [[Scale]] |
+ | | 9 [[Iron Ingot|Iron]]<br>3 [[Scale]] |
| |
| |
||
| |
| |
||
| Line 225: | Line 224: | ||
|align=center| [[Seifred]]<br>[[Morgren]] |
|align=center| [[Seifred]]<br>[[Morgren]] |
||
|align=center| 80-90 |
|align=center| 80-90 |
||
| − | |align=right| {{Cost|1| |
+ | |align=right| {{Cost|1|000}} |
| |
| |
||
| |
| |
||
| − | | 25 [[Iron]]<br>4 [[Fur]] |
+ | | 25 [[Iron Ingot|Iron]]<br>4 [[Fur Square|Fur]] |
| − | | 25 [[Iron]]<br>4 [[Steel]] |
+ | | 25 [[Iron Ingot|Iron]]<br>4 [[Steel Ingot|Steel]] |
| − | | 25 [[Iron]]<br>4 [[Scale]] |
+ | | 25 [[Iron Ingot|Iron]]<br>4 [[Scale]] |
| − | | 25 [[Iron]]<br>4 [[Steel]] |
+ | | 25 [[Iron Ingot|Iron]]<br>4 [[Steel Ingot|Steel]] |
| |
| |
||
|- |
|- |
||
| Line 240: | Line 239: | ||
|- |
|- |
||
! Location || Crafter || [[Armor (rating)|Armor]] || Price |
! Location || Crafter || [[Armor (rating)|Armor]] || Price |
||
| − | ! Ascalon || Dragon || Platemail |
+ | ! Ascalon || Dragon || Platemail || Gladiators || Knight's |
|- bgcolor=gold |
|- bgcolor=gold |
||
! [[Marhan's Grotto]] |
! [[Marhan's Grotto]] |
||
| Line 246: | Line 245: | ||
| align=center| 80 |
| align=center| 80 |
||
|rowspan="2" align=right| {{Cost|15|0}} |
|rowspan="2" align=right| {{Cost|15|0}} |
||
| − | | 50 [[Iron]]<br>5 [[Fur]] |
+ | | 50 [[Iron Ingot|Iron]]<br>5 [[Fur Square|Fur]] |
| |
| |
||
| |
| |
||
| + | | 50 [[Iron Ingot|Iron]]<br>16 [[Tanned Hide Square|Hide]] |
||
| ⚫ | |||
|- bgcolor=gold |
|- bgcolor=gold |
||
! [[The Granite Citadel]] |
! [[The Granite Citadel]] |
||
|align=center| [[Hagen]] |
|align=center| [[Hagen]] |
||
| − | | align=center| |
+ | | align=center| 80 |
| + | | |
||
| ⚫ | |||
| + | | 50 [[Iron Ingot|Iron]] <br> 5 [[Deldrimor Steel Ingot|D. Steel]] |
||
| + | | |
||
| |
| |
||
| ⚫ | |||
| ⚫ | |||
|} |
|} |
||
| − | |||
===Prophecies Campaign - Collector=== |
===Prophecies Campaign - Collector=== |
||
| Line 313: | Line 315: | ||
| align=center| 35 |
| align=center| 35 |
||
|align=right| {{Cost|50}} |
|align=right| {{Cost|50}} |
||
| − | | 2 [[Hide]] |
+ | | 2 [[Tanned Hide Square|Hide]] |
| − | | 2 [[Hide]]<br>1 [[Iron]] |
+ | | 2 [[Tanned Hide Square|Hide]]<br>1 [[Iron Ingot|Iron]] |
|- |
|- |
||
! [[Seitung Harbor]] |
! [[Seitung Harbor]] |
||
| Line 320: | Line 322: | ||
| align=center| 65 |
| align=center| 65 |
||
|align=right| {{Cost|150}} |
|align=right| {{Cost|150}} |
||
| − | | 8 [[Hide]] |
+ | | 8 [[Tanned Hide Square|Hide]] |
| − | | 8 [[Hide]]<br>2 [[Steel]] |
+ | | 8 [[Tanned Hide Square|Hide]]<br>2 [[Steel Ingot|Steel]] |
|- bgcolor=lightgreen |
|- bgcolor=lightgreen |
||
! [[Kaineng Center]] |
! [[Kaineng Center]] |
||
| Line 327: | Line 329: | ||
| rowspan=5 align=center| 80 |
| rowspan=5 align=center| 80 |
||
|rowspan=5 align=right| {{Cost|1|500}} |
|rowspan=5 align=right| {{Cost|1|500}} |
||
| − | |rowspan=3| 25 [[Hide]] |
+ | |rowspan=3| 25 [[Tanned Hide Square|Hide]] |
| − | |rowspan=3| 25 [[Hide]]<br>4 [[Steel]] |
+ | |rowspan=3| 25 [[Tanned Hide Square|Hide]]<br>4 [[Steel Ingot|Steel]] |
|- bgcolor=lightgreen |
|- bgcolor=lightgreen |
||
! [[Bukdek Byway]] |
! [[Bukdek Byway]] |
||
| Line 339: | Line 341: | ||
| [[Tateos]] |
| [[Tateos]] |
||
| |
| |
||
| − | | 25 [[Scale]]<br>25 [[Chitin]]<br>3 [[Jadeite]] |
+ | | 25 [[Scale]]<br>25 [[Chitin Fragment|Chitin]]<br>3 [[Jadeite Shard|Jadeite]] |
|- bgcolor=lightgreen |
|- bgcolor=lightgreen |
||
! [[House zu Heltzer]] |
! [[House zu Heltzer]] |
||
| [[Morbach]] |
| [[Morbach]] |
||
| |
| |
||
| − | | 25 [[Iron]]<br>4 [[Steel]]<br>3 [[Amber]] |
+ | | 25 [[Iron Ingot|Iron]]<br>4 [[Steel Ingot|Steel]]<br>3 [[Amber Chunk|Amber]] |
|- bgcolor=gold |
|- bgcolor=gold |
||
! [[Divine Path]] |
! [[Divine Path]] |
||
| Line 351: | Line 353: | ||
|rowspan=3 align=right| {{Cost|15|0}} |
|rowspan=3 align=right| {{Cost|15|0}} |
||
| |
| |
||
| − | | 50 [[Iron]]<br>5 [[Steel]] |
+ | | 50 [[Iron Ingot|Iron]]<br>5 [[Steel Ingot|Steel]] |
|- bgcolor=gold |
|- bgcolor=gold |
||
! [[Leviathan Pits]] |
! [[Leviathan Pits]] |
||
| [[Mikolas]] |
| [[Mikolas]] |
||
| |
| |
||
| − | | 50 [[Scale]]<br>50 [[Chitin]]<br>10 [[Jadeite]] |
+ | | 50 [[Scale]]<br>50 [[Chitin Fragment|Chitin]]<br>10 [[Jadeite Shard|Jadeite]] |
|- bgcolor=gold |
|- bgcolor=gold |
||
! [[Vasburg Armory]] |
! [[Vasburg Armory]] |
||
| [[Giygas]] |
| [[Giygas]] |
||
| |
| |
||
| − | | 50 [[Iron]]<br>5 [[Steel]]<br>10 [[Amber]] |
+ | | 50 [[Iron Ingot|Iron]]<br>5 [[Steel Ingot|Steel]]<br>10 [[Amber Chunk|Amber]] |
|} |
|} |
||
===Core - Crafting=== |
===Core - Crafting=== |
||
| − | Every piece of [[Warrior Obsidian |
+ | Every piece of [[Warrior Obsidian armor|Obsidian armor]] costs 15{{Plat}}, plus the following materials: |
{| style="clear:right; margin: 0 0 0.5em 1em; border-collapse:collapse;" border="1" cellpadding="2em" |
{| style="clear:right; margin: 0 0 0.5em 1em; border-collapse:collapse;" border="1" cellpadding="2em" |
||
|- |
|- |
||
| Line 401: | Line 403: | ||
--> |
--> |
||
! Duelist's Helm |
! Duelist's Helm |
||
| − | | 5 [[Silk]] |
+ | | 5 [[Bolt of Silk|Silk]] |
|} |
|} |
||
| Line 407: | Line 409: | ||
Click on the armor name to view full information, or click on the female/male link to only view the respective gallery. |
Click on the armor name to view full information, or click on the female/male link to only view the respective gallery. |
||
| − | ''Note: The Executioner's, Dwarven, Brute's, Duelist's and Tactician's Helms all look like the Gladiator |
+ | ''Note: The Executioner's, Dwarven, Brute's, Duelist's and Tactician's Helms all look like the Gladiator. The Lieutenant's Helm looks like the Templar.'' |
| ⚫ | |||
| − | |||
| ⚫ | |||
| ⚫ | |||
| ⚫ | |||
| ⚫ | |||
| ⚫ | |||
label1=Recruit's Cap| |
label1=Recruit's Cap| |
||
female1=Image:Warrior_Ascalon_Armor_F_gray_head_front.jpg| |
female1=Image:Warrior_Ascalon_Armor_F_gray_head_front.jpg| |
||
| − | male1=Image: |
+ | male1=Image:Warrior_Ascalon_Armor_M_gray_head_front.jpg| |
| − | location1=Ascalon City (Post-Searing){{ |
+ | location1=Ascalon City (Post-Searing){{!}}Ascalon City| |
| − | link2=Warrior Gladiator |
+ | link2=Warrior Gladiator armor| |
| − | label2=Gladiator |
+ | label2=Gladiator| |
| − | female2=Image: |
+ | female2=Image:Warrior_Gladiator_Armor_F_gray_head_front.jpg| |
| − | male2=Image: |
+ | male2=Image:Warrior_Gladiator_Armor_M_gray_head_front.jpg| |
| − | location2=Ascalon City (Post-Searing){{ |
+ | location2=Ascalon City (Post-Searing){{!}}Ascalon City| |
| − | link3=Warrior Tyrian |
+ | link3=Warrior Tyrian armor| |
| − | label3= |
+ | label3=Tyrian| |
| − | female3=Image: |
+ | female3=Image:Warrior Tyrian Armor F gray head front.jpg| |
| − | male3=Image: |
+ | male3=Image:Warrior Tyrian Armor M gray head front.jpg| |
location3=Ventari's Refuge| |
location3=Ventari's Refuge| |
||
| − | link4=Warrior Krytan |
+ | link4=Warrior Krytan armor| |
| − | label4= |
+ | label4=Krytan| |
| − | female4=Image:Warrior Krytan Armor |
+ | female4=Image:Warrior Krytan Armor F gray head front.jpg| |
| − | male4=Image:Warrior Krytan Armor |
+ | male4=Image:Warrior Krytan Armor M gray head front.jpg| |
location4=The Amnoon Oasis| |
location4=The Amnoon Oasis| |
||
}} |
}} |
||
===[[Prophecies]] headgear=== |
===[[Prophecies]] headgear=== |
||
| − | {{gallery index| |
+ | {{Common gallery index| |
| − | link1=Warrior |
+ | link1=Warrior Charr Hide armor| |
| − | label1= |
+ | label1=Charr Hide| |
| − | female1=Image:Warrior |
+ | female1=Image:Warrior Charr Hide Armor F gray head front.jpg| |
| − | male1=Image:Warrior |
+ | male1=Image:Warrior Charr Hide Armor M gray head front.jpg| |
| − | location1=Ascalon City (Post-Searing){{ |
+ | location1=Ascalon City (Post-Searing){{!}}Ascalon City| |
| − | link2=Warrior |
+ | link2=Warrior Templar armor| |
| − | label2= |
+ | label2=Templar| |
| − | female2=Image: |
+ | female2=Image:Warrior Templar Armor F gray head front.jpg| |
| − | male2=Image: |
+ | male2=Image:Warrior Templar Armor M gray head front.jpg| |
location2=Droknar's Forge| |
location2=Droknar's Forge| |
||
| − | link3=Warrior Wyvern |
+ | link3=Warrior Wyvern armor| |
label3=Wyvern| |
label3=Wyvern| |
||
| − | female3=Image: |
+ | female3=Image:Warrior Wyvern Armor F gray head front.jpg| |
| − | male3=Image: |
+ | male3=Image:Warrior Wyvern Armor M gray head front.jpg| |
| − | location3=Ascalon City (Post-Searing){{ |
+ | location3=Ascalon City (Post-Searing){{!}}Ascalon City| |
| − | link4=Warrior Platemail |
+ | link4=Warrior Platemail armor| |
label4=Platemail| |
label4=Platemail| |
||
| − | female4=Image: |
+ | female4=Image:Warrior Platemail Armor F gray head front.jpg| |
| − | male4=Image: |
+ | male4=Image:Warrior Platemail Armor M gray head front.jpg| |
location4=Droknar's Forge| |
location4=Droknar's Forge| |
||
}} |
}} |
||
| − | ===Prophecies |
+ | ===[[Prophecies]] Elite headgear=== |
| − | {{gallery index| |
+ | {{Common gallery index| |
| − | link1= |
+ | link1=Warrior Elite Charr Hide armor| |
| − | label1= |
+ | label1=Elite Charr Hide| |
| − | female1=Image:Warrior |
+ | female1=Image:Warrior Elite Charr Hide Armor F gray head front.jpg| |
| − | male1=Image:Warrior |
+ | male1=Image:Warrior Elite Charr Hide Armor M gray head front.jpg| |
location1=Marhan's Grotto| |
location1=Marhan's Grotto| |
||
| − | link2=Warrior Dragon |
+ | link2=Warrior Elite Dragon armor| |
| − | label2= |
+ | label2=Elite Dragon| |
| − | female2=Image:Warrior Dragon Armor |
+ | female2=Image:Warrior Elite Dragon Armor F gray head front.jpg| |
| − | male2=Image:Warrior Dragon Armor |
+ | male2=Image:Warrior Elite Dragon Armor M gray head front.jpg| |
location2=The Granite Citadel| |
location2=The Granite Citadel| |
||
| − | link3=Warrior |
+ | link3=Warrior Elite Gladiator armor| |
| − | label3= |
+ | label3=Elite Gladiator| |
| − | female3=Image:Warrior |
+ | female3=Image:Warrior Elite Gladiator Armor F gray head front.jpg| |
| − | male3=Image:Warrior |
+ | male3=Image:Warrior Elite Gladiator Armor M gray head front.jpg| |
| − | location3= |
+ | location3=Marhan's Grotto| |
| + | |||
| + | link4=Warrior Elite Platemail armor| |
||
| + | label4=Elite Platemail| |
||
| + | female4=Image:Warrior Elite Platemail Armor F gray head front.jpg| |
||
| + | male4=Image:Warrior Elite Platemail Armor M gray head front.jpg| |
||
| + | location4=The Granite Citadel| |
||
| + | |||
| + | link5=Warrior Elite Templar armor| |
||
| + | label5=Elite Templar| |
||
| + | female5=Image:Warrior Elite Templar Armor F gray head front.jpg| |
||
| + | male5=Image:Warrior Elite Templar Armor M gray head front.jpg| |
||
| + | location5=Marhan's Grotto| |
||
}} |
}} |
||
===Core Headgear=== |
===Core Headgear=== |
||
| − | {{gallery index| |
+ | {{Common gallery index| |
| − | link1=Warrior Obsidian |
+ | link1=Warrior Obsidian armor| |
label1=Obsidian| |
label1=Obsidian| |
||
| − | female1=Image: |
+ | female1=Image:Warrior Obsidian Armor F gray head front.jpg| |
| − | male1=Image: |
+ | male1=Image:Warrior Obsidian Armor M gray head front.jpg| |
location1=Fissure of Woe| |
location1=Fissure of Woe| |
||
}} |
}} |
||
| ⚫ | |||
| − | |||
| ⚫ | |||
| ⚫ | |||
| ⚫ | |||
| ⚫ | |||
| − | + | label1=Ascalon| |
|
| ⚫ | |||
female1=Image:Warrior Ascalon Armor F gray head front.jpg| |
female1=Image:Warrior Ascalon Armor F gray head front.jpg| |
||
| − | male1=Image: |
+ | male1=Image:Warrior Ascalon Armor M gray head front.jpg| |
location1=Shing Jea Monastery| |
location1=Shing Jea Monastery| |
||
| − | link2=Warrior Tyrian |
+ | link2=Warrior Tyrian armor| |
label2=Tyrian| |
label2=Tyrian| |
||
| − | female2=Image: |
+ | female2=Image:Warrior Tyrian Armor F gray head front.jpg| |
| − | male2=Image: |
+ | male2=Image:Warrior Tyrian Armor M gray head front.jpg| |
location2=Wajjun Bazaar| |
location2=Wajjun Bazaar| |
||
| − | link3=Warrior Krytan |
+ | link3=Warrior Krytan armor| |
label3=Krytan| |
label3=Krytan| |
||
| − | female3=Image:Warrior Krytan Armor |
+ | female3=Image:Warrior Krytan Armor F gray head front.jpg| |
| − | male3=Image:Warrior Krytan Armor |
+ | male3=Image:Warrior Krytan Armor M gray head front.jpg| |
location3=Bukdek Byway| |
location3=Bukdek Byway| |
||
}} |
}} |
||
| − | {{gallery index| |
+ | {{Common gallery index| |
| − | link1=Warrior Shing Jea |
+ | link1=Warrior Shing Jea armor| |
label1=Shing Jea| |
label1=Shing Jea| |
||
female1=Image:Warrior_Shing_Jea_Armor_F_gray_head_front.jpg| |
female1=Image:Warrior_Shing_Jea_Armor_F_gray_head_front.jpg| |
||
| − | male1=Image: |
+ | male1=Image:Warrior_Shing_Jea_Armor_M_gray_head_front.jpg| |
location1=Shing Jea Monastery| |
location1=Shing Jea Monastery| |
||
| − | link2=Warrior Canthan |
+ | link2=Warrior Canthan armor| |
label2=Canthan| |
label2=Canthan| |
||
female2=Image:Warrior Canthan Armor F gray head front.jpg| |
female2=Image:Warrior Canthan Armor F gray head front.jpg| |
||
| Line 529: | Line 541: | ||
location2=Shing Jea Monastery| |
location2=Shing Jea Monastery| |
||
| − | link3=Warrior Luxon |
+ | link3=Warrior Luxon armor| |
label3=Luxon| |
label3=Luxon| |
||
| − | female3=Image: |
+ | female3=Image:Warrior Luxon Armor F gray head front.jpg| |
| − | male3=Image: |
+ | male3=Image:Warrior Luxon Armor M gray head front.jpg| |
location3=Cavalon| |
location3=Cavalon| |
||
| − | link4=Warrior Kurzick |
+ | link4=Warrior Kurzick armor| |
label4=Kurzick| |
label4=Kurzick| |
||
| − | female4=Image: |
+ | female4=Image:Warrior Kurzick Armor F gray head front.jpg| |
| − | male4=Image: |
+ | male4=Image:Warrior Kurzick Armor M gray head front.jpg| |
location4 = House zu Heltzer| |
location4 = House zu Heltzer| |
||
}} |
}} |
||
| − | ===[[Factions]] |
+ | ===[[Factions]] Elite Headgear=== |
| − | {{gallery index| |
+ | {{Common gallery index| |
| − | link1=Warrior |
+ | link1=Warrior Elite Canthan armor| |
label1=Canthan 15k| |
label1=Canthan 15k| |
||
| − | female1=Image: |
+ | female1=Image:Warrior Elite Canthan Armor F gray head front.jpg| |
| − | male1=Image: |
+ | male1=Image:Warrior Elite Canthan Armor M gray head front.jpg| |
location1=Divine Path| |
location1=Divine Path| |
||
| − | link2=Warrior |
+ | link2=Warrior Elite Kurzick armor| |
| − | label2= |
+ | label2=Kurzick 15k| |
| − | female2=Image: |
+ | female2=Image:Warrior Elite Kurzick Armor F gray head front.jpg| |
| − | male2=Image: |
+ | male2=Image:Warrior Elite Kurzick Armor M gray head front.jpg| |
| − | location2= |
+ | location2=Vasburg Armory| |
| − | link3=Warrior |
+ | link3=Warrior Elite Luxon armor| |
| − | label3= |
+ | label3=Luxon 15k| |
| − | female3=Image:Warrior |
+ | female3=Image:Warrior Elite Luxon Armor F gray head front.jpg| |
| − | male3=Image:Warrior |
+ | male3=Image:Warrior Elite Luxon Armor M gray head front.jpg| |
| − | location3= |
+ | location3=Leviathan Pits| |
}} |
}} |
||
| − | ===[[Nightfall]] Standard |
+ | ===[[Nightfall]] Standard Headgear=== |
| − | {{gallery index| |
+ | {{Common gallery index| |
| − | link1=Warrior Istani |
+ | link1=Warrior Istani armor| |
label1=Istani| |
label1=Istani| |
||
female1=Image:Warrior_Istani_Armor_F_gray_head_front.jpg| |
female1=Image:Warrior_Istani_Armor_F_gray_head_front.jpg| |
||
| − | male1=Image: |
+ | male1=Image:Warrior_Istani_Armor_M_gray_head_front.jpg| |
location1=Kamadan| |
location1=Kamadan| |
||
| − | link2=Warrior Sunspear |
+ | link2=Warrior Sunspear armor| |
label2=Sunspear| |
label2=Sunspear| |
||
female2=Image:Warrior_Sunspear_Armor_F_gray_head_front.jpg| |
female2=Image:Warrior_Sunspear_Armor_F_gray_head_front.jpg| |
||
| − | male2=Image: |
+ | male2=Image:Warrior_Sunspear_Armor_M_gray_head_front.jpg| |
location2=Kamadan| |
location2=Kamadan| |
||
}} |
}} |
||
| − | ===[[Nightfall]] |
+ | ===[[Nightfall]] Elite Headgear=== |
| − | {{gallery index| |
+ | {{Common gallery index| |
| − | link1=Warrior Elite Sunspear |
+ | link1=Warrior Elite Sunspear armor| |
label1=Elite Sunspear| |
label1=Elite Sunspear| |
||
| − | female1=Image: |
+ | female1=Image:Warrior Elite Sunspear Armor F gray head front.jpg| |
| − | male1=Image: |
+ | male1=Image:Warrior Elite Sunspear Armor M gray head front.jpg| |
location1=Command Post| |
location1=Command Post| |
||
| − | link2=Warrior Vabbian |
+ | link2=Warrior Vabbian armor| |
label2=Vabbian| |
label2=Vabbian| |
||
| − | female2=Image:Warrior Vabbian Armor |
+ | female2=Image:Warrior Vabbian Armor F gray head front.jpg| |
| − | male2=Image: |
+ | male2=Image:Warrior Vabbian Armor M gray head front.jpg| |
location2=The Kodash Bazaar| |
location2=The Kodash Bazaar| |
||
| − | link3=Warrior Ancient |
+ | link3=Warrior Ancient armor| |
label3=Ancient| |
label3=Ancient| |
||
| − | female3=Image: |
+ | female3=Image:Warrior Ancient Armor F gray head front.jpg| |
| − | male3=Image: |
+ | male3=Image:Warrior Ancient Armor M gray head front.jpg| |
location3=Bone Palace| |
location3=Bone Palace| |
||
| − | link4=Warrior Primeval |
+ | link4=Warrior Primeval armor| |
label4=Primeval| |
label4=Primeval| |
||
| − | female4=Image: |
+ | female4=Image:Warrior Primeval Armor F gray head front.jpg| |
| − | male4=Image: |
+ | male4=Image:Warrior Primeval Armor M gray head front.jpg| |
location4=Throne of Secrets| |
location4=Throne of Secrets| |
||
}} |
}} |
||
| + | ===[[Eye of the North]] Elite Headgear=== |
||
| + | {{Common gallery index| |
||
| + | link1=Warrior Asuran armor| |
||
| + | label1=Asuran| |
||
| + | female1=Image:Warrior Asuran Armor F gray head front.jpg| |
||
| + | male1=Image:Warrior_Asuran_Armor_M_gray_head front.jpg| |
||
| + | location1=Rata Sum| |
||
| + | |||
| + | link2=Warrior Monument armor| |
||
| + | label2=Monument| |
||
| + | female2=Image:Warrior_Norn_Monument_F_gray_front_head.jpg| |
||
| + | male2=Image:Warrior_Norn_Monument_M_gray_front_head.jpg| |
||
| + | location2=Eye of the North (outpost)| |
||
| + | |||
| + | link3=Warrior Norn armor| |
||
| + | label3=Norn| |
||
| + | female3=Image:Warrior_Norn_Armor_F_gray_head_front.jpg| |
||
| + | male3=Image:Warrior_Norn_Armor_M_gray_head_front.jpg| |
||
| + | location3=Gunnar's Hold| |
||
| + | }} |
||
| + | |||
| + | [[Category:Armor by profession]] |
||
[[Category:Armor quick references]] |
[[Category:Armor quick references]] |
||
| + | |||
| + | [[de:Krieger-Kopfschmuck]] |
||
Latest revision as of 00:42, 27 February 2011
|
This article needs to be cleaned up to conform to a higher standard of quality. |
Description[ | ]
This chart shows the different types of attribute and other headgear available to Warriors.
Note: The "No bonus" helms do have a bonus. They have armor +20 vs. physical attacks. Although, all helms except Chainmail have that bonus, so it does not count as a bonus.
| Campaign | No bonus | +1 Axe Mastery | +1 Hammer Mastery | +1 Strength | +1 Swordsmanship | +1 Tactics | +1 Energy | Reduce Hex |
|---|---|---|---|---|---|---|---|---|
| PvP | Recruit's Cap | Executioner's Helm | Dwarven Helm | Brute's Helm Knight's Helm Dragon Helm Sentinel's Helm |
Duelist's Helm | Gladiator's Helm | Gladiator's Helm | Lieutenant's Helm |
| Prophecies Campaign | Recruit's Cap Chainmail Helm Soldier's Helm |
Executioner's Helm | Dwarven Helm | Brute's Helm Knight's Helm Wyvern Helm Platemail Helm |
Duelist's Helm | Tactician's Helm Ascalon Helm Gladiator's Helm |
Gladiator's Helm | Lieutenant's Helm |
| Factions Campaign | Warrior's Helm | Executioner's Helm | Bruiser's Helm | Knight's Helm Dreadnought's Helm Sentinel's Helm |
Duelist's Helm | Gladiator's Helm | Gladiator's Helm |
Acquisition[ | ]
Prophecies Campaign - Crafting[ | ]
Helms with the same art[ | ]
| Location | Crafter | Armor | Gold | +1 Axe | +1 Hammer | +1 Strength | +1 Sword | +1 Tactics | +1 Energy +1 Tactics | |
|---|---|---|---|---|---|---|---|---|---|---|
| Recruit's | Executioner's | Dwarven | Brute's | Duelist's | Tactician's | Gladiator's | ||||
| Ascalon City Piken Square |
Banoit Harlan |
35 | 50 |
1 Iron | ||||||
| Ascalon City | Corwen | 50 | 150 |
2 Iron | 4 Iron 1 Steel |
4 Iron 4 Hide | ||||
| Yak's Bend | Breyshaw | |||||||||
| Lion's Arch | Samuka | |||||||||
| Bergen Hot Springs | Kailan | 59 | 250 |
3 Iron | 6 Iron 1 Steel |
6 Iron 6 Hide | ||||
| Beetletun | Shada | |||||||||
| Quarrel Falls | Saphir | |||||||||
| Ventari's Refuge | Hanita | 65 | 400 |
8 Iron 2 Steel |
8 Iron 8 Hide | |||||
| Henge of Denravi | Alemeth | |||||||||
| The Amnoon Oasis | Kathir | 71 | 700 |
9 Iron 3 Steel |
9 Iron 9 Hide | |||||
| Droknar's Forge | Seifred Morgren |
80 | 1 |
25 Iron 4 Steel |
25 Iron 16 Hide | |||||
[ | ]
| Location | Crafter | Armor | Gold | +1 Tactics Reduce 3 dmg |
+1 Strength Reduce 3 dmg |
+1 Strength | +1 Strength | Reduce Hex | ||
|---|---|---|---|---|---|---|---|---|---|---|
| Chainmail | Soldier's | Ascalon | Knight's | Wyvern | Platemail | Lieutenant's | ||||
| Ascalon City Piken Square |
Banoit Harlan |
35 | 50 |
2 Iron | ||||||
| Ascalon City | Corwen | 50-60 | 150 |
4 Iron 1 Fur |
4 Iron 1 Scale |
|||||
| Yak's Bend | Breyshaw | |||||||||
| Lion's Arch | Samuka | |||||||||
| Bergen Hot Springs | Kailan | 59-64 | 250 |
6 Iron 1 Fur |
6 Iron 1 Scale |
|||||
| Beetletun | Shada | |||||||||
| Quarrel Falls | Saphir | |||||||||
| Henge of Denravi | Alemeth | 60 | 400 |
8 Iron 2 Silk | ||||||
| Ventari's Refuge | Hanita | 65-70 | 400 |
4 Iron | 8 Iron 2 Fur |
8 Iron 2 Scale |
||||
| Henge of Denravi | Alemeth | |||||||||
| The Amnoon Oasis | Kathir | 71-76 | 700 |
8 Iron | 9 Iron 3 Steel |
9 Iron 3 Fur |
9 Iron 3 Scale |
|||
| Droknar's Forge | Seifred Morgren |
80-90 | 1 |
25 Iron 4 Fur |
25 Iron 4 Steel |
25 Iron 4 Scale |
25 Iron 4 Steel |
Ascended Helms[ | ]
| Location | Crafter | Armor | Price | Ascalon | Dragon | Platemail | Gladiators | Knight's |
|---|---|---|---|---|---|---|---|---|
| Marhan's Grotto | Karl | 80 | 15 |
50 Iron 5 Fur |
50 Iron 16 Hide |
50 Iron 5 D. Steel | ||
| The Granite Citadel | Hagen | 80 | 50 Iron 5 Scale |
50 Iron 5 D. Steel |
Prophecies Campaign - Collector[ | ]
Collectors throughout the land are willing to trade you armor for the following items. To find out who and where the collectors for each item are, click on the item's name.
| Region | Armor | +1 Strength | +1 Swordsmanship | +1 Axe Mastery | +1 Hammer Mastery | +1 Tactics |
|---|---|---|---|---|---|---|
| Brute's | Duelist's | Executioner's | Dwarven | Tactician's | ||
| Northern Shiverpeaks | 47 | 5 Shiverpeak Manes | 5 Icy Humps | 5 Frostfire Fangs | 5 Shiverpeak Manes | 5 Frostfire Fangs |
| Kryta | 59 | 5 Gargantuan Jawbones | 5 Spiked Crests | 5 Abnormal Seeds | 5 Feathered Caromi Scalps | |
| Maguuma Jungle | 71 | 5 Tangled Seeds | 5 Behemoth Jaws | 5 Tangled Seeds | 5 Ancient Eyes | 5 Jungle Skale Fins |
| Crystal Desert | 80 | 5 Shriveled Eyes | 2 Bleached Shells | 5 Jade Mandibles | 5 Forgotten Seals |
Factions Campaign - Crafting[ | ]
Note: Warrior's Helm costs half the listed money.
| Location | Crafter | Armor | Gold | Warrior's Helm | With bonus |
|---|---|---|---|---|---|
| Shing Jea Monastery | Nu Leng | 35 | 50 |
2 Hide | 2 Hide 1 Iron |
| Seitung Harbor | Fugui Ge | 65 | 150 |
8 Hide | 8 Hide 2 Steel |
| Kaineng Center | Suki | 80 | 1 |
25 Hide | 25 Hide 4 Steel |
| Bukdek Byway | Oroku | ||||
| Wajjun Bazaar | Voldo the Exotic | ||||
| Cavalon | Tateos | 25 Scale 25 Chitin 3 Jadeite | |||
| House zu Heltzer | Morbach | 25 Iron 4 Steel 3 Amber | |||
| Divine Path | Koumei | 80 | 15 |
50 Iron 5 Steel | |
| Leviathan Pits | Mikolas | 50 Scale 50 Chitin 10 Jadeite | |||
| Vasburg Armory | Giygas | 50 Iron 5 Steel 10 Amber |
Core - Crafting[ | ]
Every piece of Obsidian armor costs 15![]() , plus the following materials:
, plus the following materials:
| Armor part | Helm |
|---|---|
| General Materials | 15 Ectoplasm 15 Shards 50 Iron |
| Additional materials needed for: | |
| Gladiator's Helm | 16 Hide |
| Knight's Helm | 5 Fur |
| Dreadnought's Helm | 5 Scales |
| Sentinel's Helm | 5 D. Steel |
| Executioner's Helm | 5 E. Leather |
| Bruiser's Helm | 5 Granite |
| Duelist's Helm | 5 Silk |
Image Gallery[ | ]
Click on the armor name to view full information, or click on the female/male link to only view the respective gallery.
Note: The Executioner's, Dwarven, Brute's, Duelist's and Tactician's Helms all look like the Gladiator. The Lieutenant's Helm looks like the Templar.
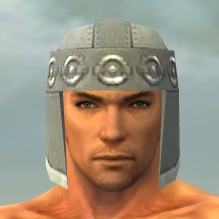
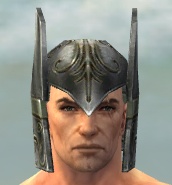
Prophecies Standard Headgear[ | ]
| Recruit's Cap | Gladiator | Tyrian | Krytan | ||||
|---|---|---|---|---|---|---|---|
| Female | Male | Female | Male | Female | Male | Female | Male |
 |
 |
 |
 |
 |
 |
 |

|
| Ascalon City | Ascalon City | Ventari's Refuge | The Amnoon Oasis | ||||
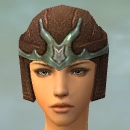
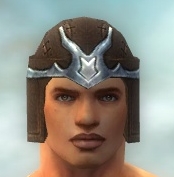
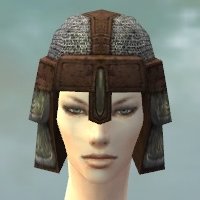
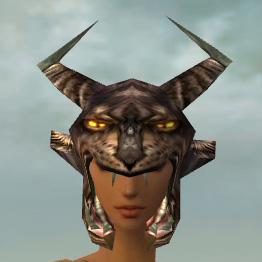
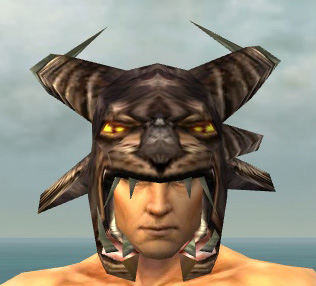
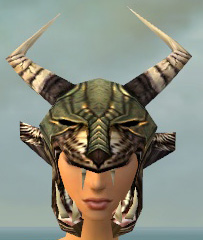
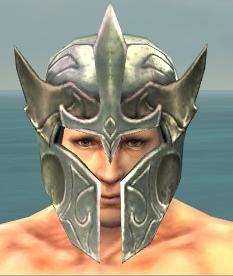
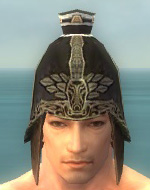
Prophecies headgear[ | ]
| Charr Hide | Templar | Wyvern | Platemail | ||||
|---|---|---|---|---|---|---|---|
| Female | Male | Female | Male | Female | Male | Female | Male |
 |
 |
 |
 |
 |
 |

| |
| Ascalon City | Droknar's Forge | Ascalon City | Droknar's Forge | ||||
Prophecies Elite headgear[ | ]


Core Headgear[ | ]
| Obsidian | |
|---|---|
| Female | Male |
 |

|
| Fissure of Woe | |
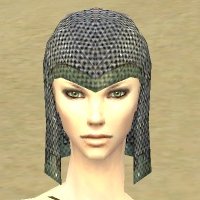
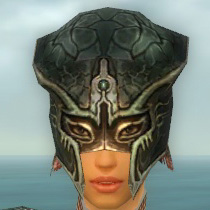
Factions Standard Headgear[ | ]
| Ascalon | Tyrian | Krytan | |||
|---|---|---|---|---|---|
| Female | Male | Female | Male | Female | Male |
|
|
|
|
|
|
| Shing Jea Monastery | Wajjun Bazaar | Bukdek Byway | |||
| Shing Jea | Canthan | Luxon | Kurzick | ||||
|---|---|---|---|---|---|---|---|
| Female | Male | Female | Male | Female | Male | Female | Male |
 |
 |
 |
 |
 |
 |
 |

|
| Shing Jea Monastery | Shing Jea Monastery | Cavalon | House zu Heltzer | ||||
Factions Elite Headgear[ | ]
| Canthan 15k | Kurzick 15k | Luxon 15k | |||
|---|---|---|---|---|---|
| Female | Male | Female | Male | Female | Male |
 |
 |
 |
 |
 |

|
| Divine Path | Vasburg Armory | Leviathan Pits | |||
Nightfall Standard Headgear[ | ]
| Istani | Sunspear | ||
|---|---|---|---|
| Female | Male | Female | Male |
 |
 |
 |

|
| Kamadan | Kamadan | ||
Nightfall Elite Headgear[ | ]
| Elite Sunspear | Vabbian | Ancient | Primeval | ||||
|---|---|---|---|---|---|---|---|
| Female | Male | Female | Male | Female | Male | Female | Male |
 |
 |
 |
 |
 |
 |
 |

|
| Command Post | The Kodash Bazaar | Bone Palace | Throne of Secrets | ||||
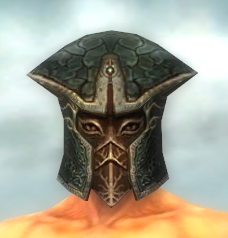
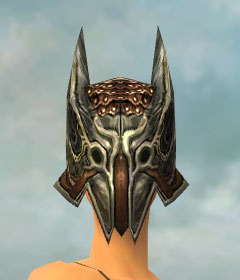
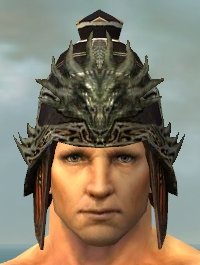
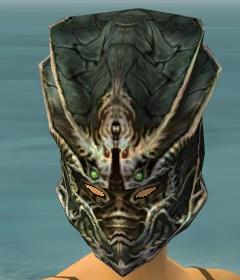
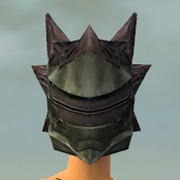
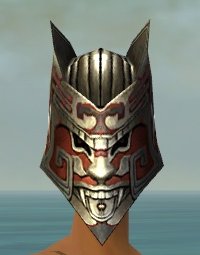
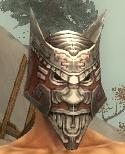
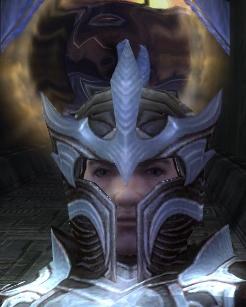
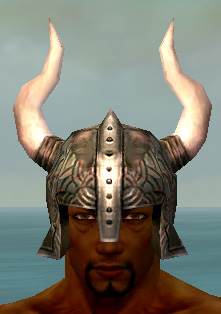
Eye of the North Elite Headgear[ | ]
| Asuran | Monument | Norn | |||
|---|---|---|---|---|---|
| Female | Male | Female | Male | Female | Male |
 |
 |
 |
 |
 |
|
| Rata Sum | Eye of the North (outpost) | Gunnar's Hold | |||